

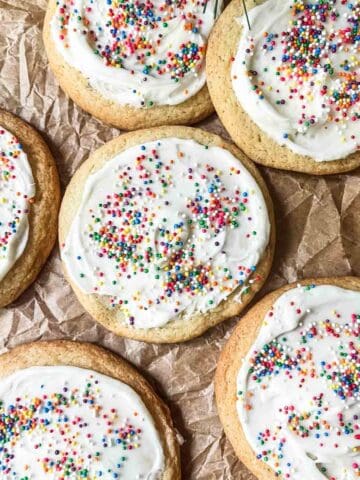
My Grandma’s Sicilian-inspired Icing Thumbprint Cookies are a holiday classic that bring back the sweetest memories of baking together in her cozy kitchen. These tender, buttery cookies are coated in a crunchy almond-sugar mixture and filled with colorful, sweet icing. Perfect for Christmas or any special occasion, they’re a beautiful and delicious tribute to her time-honored traditions. Simple, elegant, and packed with love—just like Grandma used to make!

Growing up, holidays at my Grandma’s house were always a family affair. She shared a backyard with her sisters—my great-aunts—and they each had their own signature desserts for the season. Grandma made the best cannolis and cookies, including these Italian-inspired thumbprints. These icing thumbprint cookies weren’t just a treat—they were part of the traditions that brought us all together. Now, every time I bake them, I feel connected to those memories and the love that filled her home.
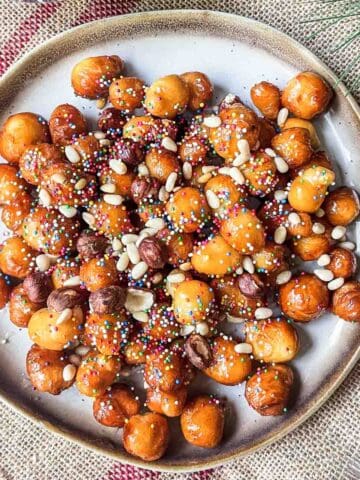
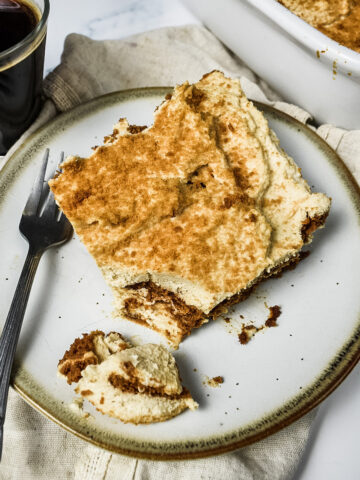
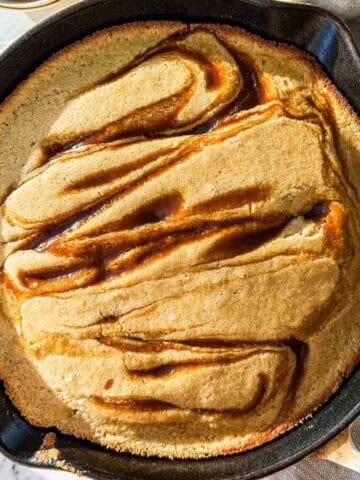
Looking for more? Try my Sicilian Pignolata, Gooey Butter Cake, Biscoff Tiramisu, Baked Figs, and Sicilian Christmas Cookies.

Jump to:
🌟 Why You'll Love this Recipe
- Rich, Buttery Flavor: These tender cookies combine simple ingredients like unsalted butter and brown sugar to create a classic cookie with a melt-in-your-mouth texture and a sweet icing center that’s irresistible.
- Perfect for Holiday Gatherings: Whether for Christmas cookies, Valentine’s Day, or a cookie exchange, these icing thumbprints add a festive, colorful touch to any celebration.
- Fun and Easy to Make: Using simple ingredients like purpose flour and almond extract, the dough forms quickly, and rolling the cookie dough balls is a hands-on step that even beginners will enjoy.
🥘 Ingredients

- Unsalted Butter: This is the base of these buttery cookies, and it’s what gives them their rich, tender texture. Make sure it’s at room temperature so it blends perfectly with the other ingredients. It’s a staple for achieving that classic cookie flavor.
- Brown Sugar: I use brown sugar for a hint of caramel-like sweetness that pairs so well with the buttery dough. It also helps keep the cookies soft and tender—a must for these festive treats like these Icing Thumbprint Cookies!
- Almond Extract: Just a touch of almond extract adds that subtle nutty flavor that makes these cookies stand out. It’s the little detail that ties everything together and gives them a slightly Sicilian twist.
- All-Purpose Flour: Good old purpose flour is what holds these cookies together. It’s simple and reliable, forming a dough that’s easy to handle and perfect for rolling into cookie dough balls.
- Egg (Separated): The yolk adds richness to the dough, while the whisked white is used for coating the cookies. It’s what helps the almond and sugar mixture stick beautifully, creating that signature crunch.
- Chopped Almonds & Raw Sugar: Finely chopped almonds mixed with coarse sugar create the perfect crunchy coating for these cookies. The nuts bring a rustic texture, while the sugar adds a lovely sparkle after baking.
- Green Icing: The sweet icing in the center of each cookie is what makes them truly festive. I love using a piping bag for precision when filling the slight indentations—it’s so satisfying!
See recipe card for quantities.
🔪 Step by Step Instructions
Prepare the Dough: In the bowl of a stand mixer fitted with the paddle attachment (or a large bowl if using a hand mixer), cream together ½ cup of unsalted butter (at room temperature) and ¼ cup of packed brown sugar until light and fluffy, about 2 minutes. Add 1 large egg yolk and ¼ teaspoon of almond extract, mixing until fully incorporated. Gradually add 1 cup of all-purpose flour and ¼ teaspoon of salt, mixing until the dough forms and pulls away from the sides of the bowl.

Chill the Dough: Wrap the dough tightly in plastic wrap and refrigerate for at least 15 minutes. This step ensures the dough is firm enough to roll into cookie dough balls without sticking or losing its shape.

Prepare the Coating: In a small bowl, whisk 1 large egg white until frothy. In a separate bowl, combine ⅓ cup of finely chopped almonds and 2 tablespoons of raw coarse sugar. This mixture will give the cookies their signature crunch.

Shape the Dough: Remove the chilled dough from the fridge and divide it into 12 equal portions. Roll each portion into a small, 1-inch ball using your hands. Dip each ball into the whisked egg white, then roll it in the almond and sugar mixture until fully coated. Place the coated cookie balls onto a prepared baking sheet lined with parchment paper or a silicone baking mat.

Create the Indentations: Using your thumb or the back of a measuring spoon, gently press into the center of each cookie ball to create a slight indentation. Be careful not to press too hard—just enough to form a well for the icing later.

Bake the Cookies: Preheat your oven to 350°F (175°C). Bake the cookies on the center rack for 8 minutes, or until the edges are lightly golden brown. Keep an eye on them to ensure they stay tender and don’t overbake.
Cool the Cookies: Let the cookies cool on the cookie sheet for about 5 minutes, then transfer them to a wire rack to cool completely. This helps them firm up while staying delicate.
Add the Icing: Once the Icing Thumbprint Cookies are fully cooled, use a piping bag or spoon to fill the center of each cookie with green icing. Let the icing set before transferring the cookies to an airtight container for storage.

👩🏼🍳 Chef's Tips
- Chill the Dough for Best Results: Letting the dough rest in the refrigerator makes it easier to handle and roll into cookie dough balls. Chilled dough also helps the cookies keep their shape while baking, resulting in tender, delicate cookies.
- Whisk the Egg White Thoroughly: Make sure to whisk the egg white until frothy before dipping the dough balls. This step helps the almond and sugar coating stick evenly, giving the cookies a beautiful crunch and a lightly golden finish.
- Don’t Skip the Parchment Paper: Using parchment paper or a silicone baking mat on your cookie sheet prevents sticking and ensures even baking. Plus, it makes cleanup so much easier!
- Use a Small Cookie Scoop: To make uniform cookie dough balls, a small cookie scoop is your best friend. It helps create cookies of the same size, which bake evenly and look great when plated.
- Let the Cookies Cool Completely Before Icing: Adding icing to warm cookies can cause it to melt and run. Make sure the cookies are fully cooled on a wire rack before filling the center of each cookie with sweet icing for a neat, polished look.
- Experiment with Different Colors: While green icing is festive, try using different colors of icing for various occasions. Pink icing makes these perfect for Valentine’s Day, while white or gold icing is a beautiful touch for weddings or special celebrations.
📖 Substitutions & Variations
Almond Extract Substitute: If you’re out of almond extract, you can use vanilla extract instead. It gives the cookies a slightly different, sweeter flavor but still pairs beautifully with the almond coating.
Nut-Free Variation: If you need to skip the almonds for allergies or preference, roll the dough balls in granulated sugar or raw sugar only. You’ll still get that lovely crunch and sparkle without the nuts.
Fig Preserves for a Traditional Twist: For a more traditional take, swap the icing for fig preserves. Simply spoon a small amount into the center of each cookie after baking. Then bake another 2-3 minutes to help the preserves set. It’s a nod to classic Sicilian flavors and adds a rich, fruity touch.
Different Icing Colors: While green icing is perfect for Christmas cookies, you can customize these cookies for any occasion. Try pink icing for Valentine’s Day, pastel colors for Easter, or white icing with silver sprinkles for a winter wedding.
🍴 Serving Suggestions
Serve with Espresso: Pair these Icing Thumbprint Cookies with a strong shot of espresso or a cup of cappuccino. The rich coffee flavors complement the almond coating and sweet icing perfectly.
Perfect for a Cookie Exchange: These colorful thumbprints are a festive addition to any holiday cookie exchange. Their eye-catching appearance and unique almond-sugar crunch make them stand out.
Holiday Cookie Tray: Arrange these cookies alongside cannoli and classic Italian snowball cookies on a beautiful tray. They add a pop of color and texture to any holiday dessert spread.
Pair with Dessert Wine: Serve with a glass of Moscato or sweet Marsala wine to enhance the sweetness of the icing and the almond flavors.
After a Sicilian Feast: End your Feast of the Seven Fishes or any Italian-inspired meal with these cookies. Their light sweetness balances the rich flavors of the main dishes.
💭 Recipe FAQs
Yes, you can! These cookies are perfect for making ahead. You can prepare the cookie dough balls, roll them in the almond-sugar coating, and store them in an airtight container in the fridge for up to 2 days before baking. Once baked and cooled, store the cookies without icing in an airtight container for up to 5 days. Add the sweet icing just before serving to keep them looking fresh and festive!
🥣 Storage & Reheating
Storage Instructions:
Store the thumbprints with icing cookies in an airtight container at room temperature for up to 5 days. To maintain their texture, place a layer of parchment paper between cookies to prevent them from sticking together. If the icing hasn’t fully set, allow it to harden before storing.
Freezing Instructions:
You can freeze these cookies either baked or unbaked:
- Baked Cookies: Once cooled, place the cookies in a single layer on a cookie sheet and freeze until firm. Transfer them to a freezer-safe bag or container, separating layers with parchment paper. They’ll keep in the freezer for up to 3 months.
- Unbaked Dough: Roll the cookie dough balls and coat them in the almond-sugar mixture. Place them on a cookie sheet, add imprint, freeze until firm, and store in a freezer-safe bag. You can bake them straight from frozen—just add 1-2 minutes to the baking time.
Defrosting Instructions:
- Baked Cookies: Let the cookies thaw at room temperature for about 30 minutes. If desired, re-crisp them by placing them in a 300°F (150°C) oven for 5 minutes. Add icing after they’re fully defrosted if you froze them undecorated.
🌿 Related Recipes

Did you make this recipe? Please leave a 5-star ⭐️⭐️⭐️⭐️⭐️ rating & comment below to let me know how it came out. Thanks for visiting!
📋 Recipe

Icing Thumbprint Cookies
Want to Save This Recipe?
Enter your email & I'll send it to your inbox. Plus, get great new recipes from me every week!
By submitting this form, you consent to receive emails from Meghan It Up.
Equipment
- Mixer with paddle attachment (or large mixing bowl and hand mixer)
- Small bowls for egg white and almond mixture
- Baking sheet
- Parchment paper or baking mat
- Spoon for filling cookies
- Wire cooling rack
Ingredients
For the Dough
- ½ cup unsalted butter softened
- ¼ cup brown sugar packed
- 1 large egg separated into yolk and white
- ¼ teaspoon almond extract
- 1 cup all-purpose flour
- ¼ teaspoon salt
For Coating & Filling
- ⅓ cup almonds finely chopped
- 2 tablespoons raw coarse sugar
- Green icing (for filling)
Instructions
- Prepare the dough: In a large mixing bowl, cream together the softened butter and brown sugar until light and fluffy, about 2 minutes. Add the egg yolk and almond extract, mixing well until combined. Fold in the flour and salt, mixing until a dough forms. Refrigerate the dough for at least 15 minutes, or until firm enough to roll.
- Shape and coat the dough: Divide the chilled dough into 12 equal portions and roll each into a ball. In a small bowl, whisk the egg white until frothy. In another bowl, combine the chopped almonds and raw sugar. Dip each dough ball into the whisked egg white, then roll in the almond and sugar mixture until fully coated. Place the coated balls onto a baking sheet lined with parchment paper or a baking mat.
- Indent and bake: Using your thumb or the back of a spoon, gently press the center of each ball to create an indentation. Bake the cookies in a preheated oven at 350°F (175°C) for 8 minutes.
- Cool and add icing: Remove from oven, and allow the cookies to cool on the baking sheet for a few minutes before transferring them to a wire rack to cool completely. Once fully cooled, add green icing into the indentation of each cookie. Then store in an airtight container.
🌡️ Food safety
- Never leave cooking food unattended
- Use oils with high smoking point to avoid harmful compounds
- Always have good ventilation when using a gas stove

Comments
No Comments