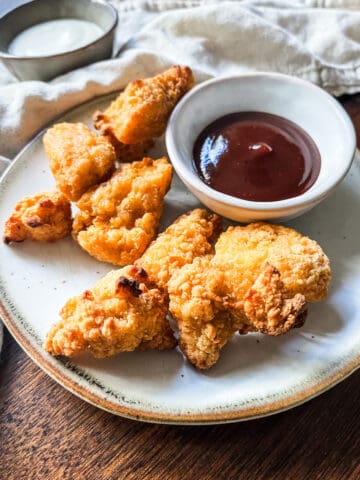
Hey there, fried chicken fanatics! Get ready to up your cooking game with this easy Fried Chicken Recipe! In only 3 steps (brine, dredge, fry), you'll be whipping up crispy, juicy goodness that's perfect for any occasion, from laid-back summer BBQs to cozy holiday feasts. Say goodbye to bland chicken dinners and hello to finger-licking deliciousness!

Fried chicken enjoys widespread popularity year-round, but it often becomes a star dish during summer gatherings like picnics and barbecues. Additionally, it's a beloved option for special occasions and holidays such as Thanksgiving and Christmas, offering a flavorful alternative to traditional feasts.
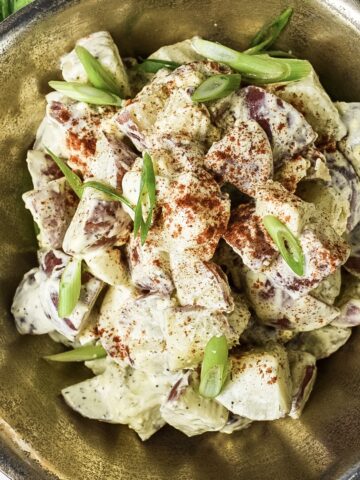
This was inspired by my Buttermilk Fried Chicken and pairs well with this creamy potato salad!
Jump to:
🌟 Why You'll Love this Recipe
- Ease of Preparation: This recipe simplifies the process of making fried chicken with clear instructions and basic ingredients, making it accessible even for beginner cooks.
- Deliciously Crispy Texture: With its unique seasoning mix and careful frying technique, this recipe ensures each bite is crispy on the outside and juicy on the inside, satisfying the craving for perfectly fried chicken.
- Versatile Flavor Profile: The blend of spices in the seasoning mix allows for customization, catering to varying taste preferences, whether you prefer a mild seasoning or a spicier kick.
🥘 Ingredients
Each ingredient in this recipe is carefully selected to enhance the flavor, texture, and juiciness of the fried chicken. From the brine that tenderizes the meat to the flavorful blend of spices in the seasoning mix, every component plays a crucial role in creating a deliciously satisfying dish.


Chicken Preparation:
- Chicken (drumsticks or thighs)
- Whole milk (or water)
- Salt
- Garlic
- Black peppercorns
- Bay leaves
Coating and Frying:
- Flour
- Cornstarch
- Kosher salt
- White pepper
- Black pepper
- Garlic powder
- Onion powder
- Cayenne pepper
- Baking powder
Wet Batter:
- Seasoning mix (from the Coating and Frying section)
- Water
Frying:
- Neutral oil
See recipe card for quantities.
🔪 Instructions

Brine the chicken in a mixture of whole milk (or water), salt, garlic, black peppercorns, and bay leaves for 2-3 hours or overnight.

Create the dry and wet mix by mixing ingredients in medium bowls.

Remove the chicken from the brine and coat it with the wet batter, then dredge it in the seasoning mix until fully coated.

Heat neutral oil in a large pan to 350°F (175°C), then fry the chicken for 8-12 minutes until golden brown and the internal temperature reaches 165°F (74°C).

Once cooked, transfer the fried chicken to a wire rack or paper towels to drain excess oil before serving.

Enjoy your delicious homemade fried chicken!
👩🏼🍳 Chef's Tip
- For extra crispy fried chicken, ensure the oil is at the correct temperature before frying. Use a deep-fry thermometer to monitor the oil temperature, aiming for 350°F (175°C). Maintaining this temperature throughout frying will result in a perfectly crispy exterior while keeping the chicken juicy on the inside.
📖 Substitutions & Variations
- Gluten-Free Option: For a gluten-free version of this recipe, you can substitute the regular all-purpose flour in the seasoning mix with a gluten-free flour blend. Additionally, when making the wet batter, ensure the baking powder used is gluten-free certified. This allows those with gluten intolerance or celiac disease, as well as their friends or family, to enjoy this delicious fried chicken without any worries.
- Dairy-Free Option: To make this recipe dairy-free, replace the whole milk in the brine with a dairy-free alternative such as almond milk, coconut milk, or soy milk. For the wet batter, use water or a dairy-free milk substitute instead of regular milk. These simple swaps accommodate individuals who are lactose intolerant or following a dairy-free diet, ensuring everyone can indulge in crispy fried chicken goodness.
- Spicy Kick: Add an extra punch of heat by increasing the amount of cayenne pepper in the seasoning mix. You can also mix some hot sauce into the wet batter for an added spicy kick. Serve with a side of cooling ranch or blue cheese dressing to balance out the heat.
🍴 Equipment
- Large mixing bowl
- Whisk
- Knife
- Baking sheet
- Deep-fry thermometer (Alternative: Instant-read thermometer)
- Large cast iron pan, Dutch oven, or heavy-bottomed pan/wok
- Tongs
- Wire rack or paper towels
💭 Recipe FAQs
While you can use chicken breast, keep in mind that it may cook faster than drumsticks or thighs. Adjust the cooking time accordingly and monitor the internal temperature to ensure it reaches 165°F (74°C) for safe consumption.
While fried chicken is best enjoyed fresh, you can make it ahead of time and reheat it later. To maintain its crispiness, place the cooked chicken on a wire rack in a preheated oven at 350°F (175°C) for about 10-15 minutes or until heated through.
Yes, you can bake the chicken instead of frying it for a healthier alternative. Place the coated chicken on a baking sheet lined with parchment paper and bake in a preheated oven at 400°F (200°C) for 25-30 minutes, flipping halfway through, or until the internal temperature reaches 165°F (74°C) and the coating is crispy.
🥣 Storage & Reheating
- Storage: Refrigerate the fried chicken in an airtight container for up to 3-4 days.
- Reheating: Heat the chicken in the oven at 350°F (175°C) for 10-15 minutes or until warmed through.
- Freezing: Simply wrap each piece of fried chicken individually in plastic wrap or aluminum foil, then place them in a freezer-safe bag or container. Label with the date and freeze for up to 2-3 months.
🍷 Wine Pairing
The effervescence (bubbles) helps cut through the fried chicken's savory flavors, making for a delightful pairing for this easy fried chicken recipe.
👩🏼🍳 Top Tips
- Ensure Proper Oil Temperature: It's crucial to maintain the oil temperature around 350°F (175°C) throughout the frying process. Use a deep-fry thermometer to monitor the temperature and adjust the heat as needed to prevent the chicken from becoming greasy or undercooked.
- Brine for Flavor and Moisture: Brining the chicken in a mixture of milk (or water), salt, garlic, peppercorns, and bay leaves adds flavor and helps keep the meat moist during frying. Allow the chicken to brine for at least 2-3 hours, or ideally overnight, for the best results.
🌿 Related Recipes
🥗 Pairing Recommendations
Did you make this recipe? Please leave a 5-star ⭐️⭐️⭐️⭐️⭐️ rating & comment below to let me know how it came out. Thanks for visiting!
📋 Recipe

Easy Fried Chicken Recipe
Want to Save This Recipe?
Enter your email & I'll send it to your inbox. Plus, get great new recipes from me every week!
By submitting this form, you consent to receive emails from Meghan It Up.
Equipment
- Large mixing bowl
- Whisk
- Knife
- Baking sheet
- Deep-fry thermometer
- Large cast iron pan, Dutch oven, or heavy-bottomed pan/wok
- Tongs
- Wire rack or paper towels
Ingredients
Chicken
- 3 lb drumsticks or thighs
- 4 cups whole milk can sub with water
- ¼ cup salt
- 8 cloves garlic
- 2 tablespoon black peppercorns
- 3 bay leaves
Seasoning Mix
- 2 cups flour
- 2 cups cornstarch
- 2 tablespoon kosher salt
- ½ tablespoon white pepper
- 1 tablespoon black pepper
- 1 tablespoon garlic powder
- 1 tablespoon onion powder
- ½ tablespoon cayenne pepper
- 1 tablespoon baking powder
Wet Batter
- 1 cup seasoning mix
- 1 cup water cold
- Neutral oil for frying
Instructions
Instructions
- Place the chicken legs in a bowl with the brine (whole milk (or water), salt, garlic, black peppercorns, and bay leaves.) Brine for 2-3 hours or overnight for best results.
- In a large mixing bowl, make the seasoning mix by combing the flour, cornstarch, kosher salt, white pepper, black pepper, garlic powder, onion powder, cayenne pepper and baking powder and whisk until combined.
- Take 1 cup of the seasoning mix and combine in a separate bowl with cold water and mix until smooth.
- Remove the chicken from the brine and spoon a few tablespoons of brine into the seasoning mix and rub together with your hands to create small clumps. These craggily bits will add extra texture to the chicken.
- Dip each piece of chicken in the wet batter and let any excess drip off. Immediately dredge in seasoning mix and press the mix into the chicken until completely coated. Let rest on a baking sheet while you heat up your oil.
- In a large cast iron pan, dutch oven, or heavy bottomed pan/wok, fry chicken at 350F for 8-12 minutes (depending on size of the chicken) until the internal temperature reads 165F.
Video
Notes
- Storage: Refrigerate the fried chicken in an airtight container for up to 3-4 days.
- Reheating: Heat the chicken in the oven at 350°F (175°C) for 10-15 minutes or until warmed through.
- Freezing: Simply wrap each piece of fried chicken individually in plastic wrap or aluminum foil, then place them in a freezer-safe bag or container. Label with the date and freeze for up to 2-3 months.
🌡️ Food safety
- Chicken - Cook to a minimum temperature of 165 °F (74 °C)
- Do not use the same utensils on cooked food, that previously touched raw meat
- Wash hands after touching raw meat
- Don't leave food sitting out at room temperature for extended periods
- Never leave cooking food unattended
- Use oils with high smoking point to avoid harmful compounds
- Always have good ventilation when using a gas stove








Meghan
This recipe is great if you don't have buttermilk and need an easy cooking process! Creates perfect fried chicken!