
Looking for the perfect ice cream base that unlocks endless flavor possibilities? Wonder no more! Discover this delightful Salt and Straw Ice Cream Base recipe, a creamy canvas to craft your dream ice cream creations. From classic flavors to bold innovations, this versatile base will satisfy every ice cream enthusiast's cravings. Let's dive into the delectable world of homemade ice cream!
Recipes to use this Salt and Straw Ice Cream Base
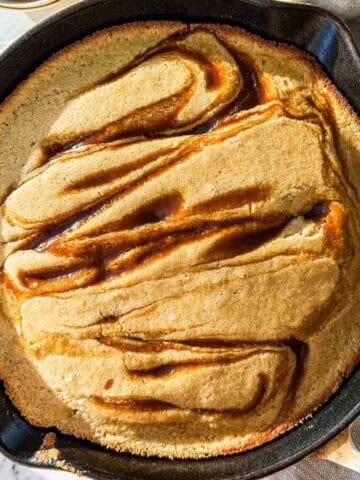
Try Carmel Ribbons Ice Cream, Olive Oil Ice Cream, or Olive Oil Sorbet.

- Why You'll Love This Recipe
- What is Salt and Straw?
- Ingredients & Substitutions
- Equipment Needed
- How to Make Ice Cream without an Ice Cream Maker
- How to Make this Recipe
- How to Double this Recipe
- How to Triple this Recipe
- What's Next?
- Types of Ice Cream Makers
- Variations
- Wine Pairing
- FAQ's
- Tips
- Looking for more recipes?
- Did You Make this Recipe?
- Recipe Card
- Salt & Straw Ice Cream Base
Why You'll Love This Recipe
- Versatility: This ice cream base serves as a versatile canvas, allowing you to experiment with a wide range of flavor combinations and mix-ins. Whether you're craving classic favorites or bold, innovative creations, this recipe offers endless possibilities to suit every taste preference.
- Creamy Perfection: The combination of whole milk and heavy cream in this recipe ensures a luxuriously creamy and smooth texture. The ice cream churned from this base will be irresistibly rich, making every spoonful a delightfully indulgent experience.
- Convenience and Quality: Crafting ice cream at home with this recipe guarantees high-quality ingredients and full control over the flavor profile. Plus, the option to store the ice cream base in the freezer for up to 3 months allows you to have a delicious treat ready whenever the craving strikes. No need to head out to the ice cream parlor when you can have a premium ice cream experience from the comfort of your kitchen!

What is Salt and Straw?
Salt & Straw is an ice cream company that originated in Portland, Oregon, in 2011. It was founded by cousins Kim and Tyler Malek. The company is known for its unique and inventive approach to ice cream, offering a wide range of creative and sometimes unconventional flavors.
Salt & Straw is particularly famous for its use of high-quality, locally sourced ingredients, often collaborating with local artisans and producers to create exclusive flavors. They have gained popularity for their seasonal flavors and limited-edition releases, as well as their commitment to sustainability and community involvement.
With its commitment to exceptional flavors and a focus on creating a memorable ice cream experience, Salt & Straw has become a beloved ice cream destination for many ice cream enthusiasts.

Ingredients & Substitutions
Full list of ingredients with measurements listed below in recipe card.
- Granulated Sugar: Provides sweetness and helps achieve the right ice cream texture. You can also use brown sugar or alternative sweeteners for different flavor profiles.
- Dry Milk Powder: Enhances creaminess and richness in the ice cream base. You can also use evaporated milk as a substitute.
- Xanthan Gum: Acts as a stabilizer, preventing ice crystal formation and improving the ice cream's smoothness. You can also use guar gum as an alternative stabilizer.
- Light Corn Syrup: Contributes to the ice cream's smooth texture and helps prevent crystallization. You can also use honey or glucose syrup as substitutes.
- Whole Milk: Provides a creamy base with a balanced fat content for optimal texture. You can also use alternative milk options like almond milk or coconut milk for dairy-free versions.
- Heavy Cream: Adds richness and creaminess to the ice cream. You can also use coconut cream or full-fat canned coconut milk for a vegan option.

Equipment Needed
- Medium Pot: To combine the corn syrup and whole milk and cook the sugar mixture.
- Whisk: For stirring and whisking the ingredients together, ensuring a smooth and well-combined ice cream base.
- Small Bowl: To mix the granulated sugar, dry milk powder, and xanthan gum before adding to the pot.
- Airtight Container: To store the ice cream base while it chills in the refrigerator.
- Refrigerator: To chill the ice cream base for at least 6 hours or up to 24 hours, allowing the flavors to develop.
- Ice Cream Maker (See note below regarding options to make ice cream without an ice cream maker): For churning the ice cream base, incorporating air, and achieving a creamy texture. It can be either an electric ice cream maker or a manual/hand-crank ice cream maker.
- Freezer: To freeze the churned ice cream until it reaches the desired consistency and is ready to be served.

How to Make Ice Cream without an Ice Cream Maker
You can still make ice cream without an ice cream maker using a simple method called the "No-Churn" method. Here's how you can do it:
Ingredients:
- 2 cups heavy cream
- 1 can (14 ounces) sweetened condensed milk
- Flavorings of your choice (e.g., vanilla extract, cocoa powder, fruit puree, crushed cookies, etc.)
Instructions:
- In a large mixing bowl, whip the heavy cream using an electric mixer until stiff peaks form. This might take a few minutes.
- Gently fold in the sweetened condensed milk into the whipped cream using a spatula. Be careful not to deflate the whipped cream too much.
- Add your desired flavorings to the mixture and gently fold them in. You can use vanilla extract, cocoa powder for chocolate ice cream, fruit puree for fruity flavors, or crushed cookies for added texture.
- Transfer the mixture to a lidded container or a loaf pan.
- Cover the container with a lid or plastic wrap and place it in the freezer.
- Let the ice cream freeze for at least 6 hours or overnight until it reaches the desired consistency.
- Once the ice cream is fully frozen, it's ready to be scooped and served!
The "No-Churn" method creates a creamy and delicious ice cream without the need for an ice cream maker. It's a simple and convenient way to make homemade ice cream with just a few basic ingredients.

How to Make this Recipe
Full step-by-step instructions listed below in recipe card.
In a small bowl, combine ½ cup granulated sugar, 2 tablespoons dry milk powder, and ¼ teaspoon xanthan gum. Stir well to ensure they are evenly mixed.


In a medium pot, pour 2 tablespoons of light corn syrup and stir in 1-⅓ cups of whole milk. Add the sugar mixture and immediately whisk vigorously until smooth and well combined.


Set the pot over medium heat and cook the mixture, stirring often. Adjust the heat if necessary to prevent it from simmering. Cook until the sugar has completely dissolved, which should take about 3 minutes. Remove the pot from the heat source.Add 1-⅓ cups of heavy cream to the mixture and whisk thoroughly until everything is fully combined.


Transfer the ice cream base mixture to an airtight container and refrigerate until it is well chilled. For the best texture and flavor, it is recommended to refrigerate for at least 6 hours, or ideally, let it rest in the fridge for 24 hours. This resting time allows the flavors to meld and develop.

Stir the base back together if it separates during the resting time. The base can be further stored in the fridge for up to 1 week or in the freezer for up to 3 months. Just be sure to fully thaw the frozen base before using it.
How to Double this Recipe
To double the "Salt and Straw Ice Cream Base" recipe, you'll need to adjust the ingredient quantities accordingly. Here's the doubled version of the recipe:
Ingredients:
- 1 cup granulated sugar
- 4 tablespoons dry milk powder
- ½ teaspoon xanthan gum
- 4 tablespoons light corn syrup
- 2 ⅔ cups whole milk
- 2 ⅔ cups heavy cream
Follow the same instructions provided in the original recipe, but now use these doubled ingredient measurements to make a larger batch of the ice cream base. Enjoy your doubled portion of delicious homemade ice cream!

How to Triple this Recipe
To triple the Salt and Straw Ice Cream Base recipe, you'll need to adjust the ingredient quantities accordingly. Here's the tripled version of the recipe:
Ingredients:
- ¾ cup granulated sugar
- 6 tablespoons dry milk powder
- ¾ teaspoon xanthan gum
- 6 tablespoons light corn syrup
- 4 cups whole milk
- 4 cups heavy cream
Follow the same instructions provided in the original recipe, but now use these tripled ingredient measurements to make a larger batch of the ice cream base. Enjoy your tripled portion of delicious homemade ice cream!
What's Next?
After you've made the Salt and Straw Ice Cream Base using the provided recipe, you have the foundation for creating various ice cream flavors. Here's what you can do next:
- Flavoring: Add your desired flavorings to the Salt and Straw ice cream base. You can get creative and add various mix-ins like chocolate chips, fruit chunks, cookie crumbles, nuts, or extracts like vanilla or mint. Consider incorporating unique ingredients to create your own signature ice cream flavors.
- Chilling: After adding the flavorings, mix everything together thoroughly. Then, refrigerate the mixture until it is well chilled. For best results, chill the ice cream base for at least 6 hours, or ideally, let it rest in the fridge for 24 hours. This resting time allows the flavors to meld and develop.
- Churning: Once the ice cream base is properly chilled, transfer it to your ice cream maker machine (electric or manual-see "Types of Ice Cream Makers" for more info). Churn the mixture according to the manufacturer's instructions. Churning incorporates air into the ice cream, giving it a creamy texture and preventing it from becoming too icy.
- Freezing: After churning, transfer the churned ice cream into an airtight container and freeze it. Let it firm up in the freezer for a few hours or until it reaches your desired consistency.
- Enjoy: Your homemade ice cream is now ready to enjoy! Scoop it into bowls or cones and savor the creamy goodness you've created.
Remember that the beauty of this ice cream base is its versatility. You can experiment with different flavors, mix-ins, and toppings to create a wide array of delightful ice cream treats.
Types of Ice Cream Makers
- Electric Ice Cream Maker: This type of machine is the most common and user-friendly. It consists of an electric motor that churns the ice cream base while it freezes. Electric ice cream makers are available in various sizes, from small countertop models suitable for home use to larger machines for commercial purposes. These machines are convenient because they automate the churning process, making it easy to achieve a smooth and creamy texture.
- Manual Ice Cream Maker: A manual ice cream maker, also known as a hand-crank ice cream maker, operates without electricity. It has a hand-crank mechanism that you turn manually to churn the ice cream while it freezes. Manual ice cream makers are a more traditional option and can be a fun activity for families or gatherings. However, they require more effort and time compared to electric models.
Both types of ice cream makers work well to make delicious homemade ice cream. When choosing an ice cream maker, consider factors like capacity, ease of use, and whether it fits your budget and space requirements.

Variations
- Vanilla Bean Ice Cream: Add 1 or 2 scraped vanilla beans to the base mixture for a classic and aromatic vanilla ice cream.
- Chocolate Ice Cream: Mix in ⅓ cup of cocoa powder into the base for a rich and decadent chocolate ice cream.
- Fruit Swirl Ice Cream: Add your favorite fruit puree (e.g., strawberry, raspberry, mango) to the base and gently swirl it in for a fruity and refreshing ice cream.
- Cookies and Cream: Fold in crushed chocolate or vanilla cookies into the base for a delicious cookies and cream ice cream.
- Coffee Ice Cream: Dissolve 2 tablespoons of instant coffee in ¼ cup of warm milk. Add this coffee mixture to the base for a creamy and flavorful coffee ice cream.
- Mint Chocolate Chip: Mix in 1 teaspoon of peppermint extract and fold in mini chocolate chips for a refreshing mint chocolate chip ice cream.
- Peanut Butter Swirl: Swirl in melted peanut butter into the base for a creamy and nutty peanut butter swirl ice cream.
- Toasted Coconut: Toast shredded coconut until golden brown and fold it into the base for a tropical and nutty toasted coconut ice cream.
- Caramel Swirl: Drizzle caramel sauce into the base and gently swirl it for a sweet and gooey caramel swirl ice cream.
- Strawberry Cheesecake: Add chunks of cheesecake and swirl in strawberry sauce for a delectable strawberry cheesecake ice cream.

Wine Pairing
- Sweet Dessert Wine: A sweet dessert wine, such as a late-harvest Riesling, Moscato d'Asti, or Sauternes, pairs well with the sweetness of the ice cream. The wine's fruity and floral notes can enhance the overall dessert experience.
- Sparkling Wine: A sparkling wine, like a demi-sec Champagne or a sparkling Moscato, can be a delightful pairing. The wine's effervescence and slight sweetness can cut through the creaminess of the ice cream and provide a refreshing contrast.
- Cream Sherry: Cream sherry is a fortified wine with a rich, nutty, and slightly sweet flavor. Its caramel and toffee notes can complement the flavors of the ice cream and create a harmonious pairing.
- Port: A tawny port with its caramel, dried fruit, and nutty characteristics can also be a great match for the ice cream's flavors. The wine's sweetness can complement the dessert's sweetness.
- Fruit Liqueurs: If you want to enhance specific fruit flavors in the ice cream, you can consider serving it with a fruit liqueur. For example, a raspberry liqueur can pair well with strawberry swirl ice cream.
FAQ's
Can I use a different type of sugar in this recipe?
Yes, you can use alternative sweeteners like brown sugar, coconut sugar, or maple syrup, but keep in mind that they might slightly alter the flavor and texture of the Salt and Straw ice cream base.
Can I make this recipe without xanthan gum?
Xanthan gum acts as a stabilizer, preventing ice crystal formation and improving texture. While you can omit it, the ice cream might not be as smooth and creamy.
Is it necessary to use corn syrup, or can I use another sweetener?
Corn syrup helps with texture and prevents crystallization. If you prefer, you can use honey, glucose syrup, or golden syrup as alternatives.
Can I use low-fat milk instead of whole milk?
Whole milk contributes to a creamier texture, but you can use low-fat milk. However, the ice cream might be slightly less rich.
Can I use half-and-half instead of heavy cream?
Heavy cream adds richness, so using half-and-half will result in a less creamy ice cream, but it can still work.
How long does the ice cream base need to chill before churning?
For best results, it's recommended to chill the base for at least 6 hours or, ideally, 24 hours to allow the flavors to develop fully.
Can I store the ice cream base in the freezer for longer than 3 months?
While the base is safe to store for up to 3 months, its quality might diminish over time. It's best to use it within the recommended time frame.
Can I make this recipe without an ice cream maker?
Yes, you can! The "No-Churn" method is an option for making ice cream without an ice cream maker.
Can I add mix-ins and flavors directly to the base before churning?
Yes, absolutely! You can add your desired mix-ins and flavors, such as chocolate chips, fruit chunks, or extracts, to customize your ice cream.
Can I use this base to make dairy-free or vegan ice cream?
Yes, you can! Substitute dairy ingredients with plant-based alternatives like almond milk, coconut cream, or cashew milk to create a vegan version of the ice cream base.

Tips
- Accurate Measurements: Use precise measurements for the ingredients to achieve the right balance of sweetness and creaminess in the Salt and Straw ice cream base.
- Fully Dissolve Sugar: Ensure the sugar is fully dissolved when cooking the mixture over medium heat. Stirring well will prevent any graininess in the final product.
- Chill Thoroughly: Allow the ice cream base to chill in the refrigerator for at least 6 hours or, ideally, 24 hours. This resting time enhances the flavors and results in a smoother texture.
- Watch the Heat: When cooking the mixture, avoid bringing it to a simmer. Adjust the heat to prevent overheating and ensure a proper texture.
- Stirring and Whisking: Vigorously whisk the mixture when combining the sugar, milk, and corn syrup. Also, stir the base if it separates during the chilling process.
- Experiment with Flavors: Be adventurous with your flavor combinations. Add extracts, fruits, chocolate, or any mix-ins you desire to create unique ice cream flavors.
- Quality Ingredients: Use high-quality ingredients for the best taste and texture. Fresh milk, heavy cream, and real flavorings will make a difference.
- Thawing the Base: If using a frozen base, make sure to fully thaw it before churning to ensure even freezing and a smoother result.
- Ice Cream Maker Instructions: Follow the instructions of your ice cream maker for churning times and procedures. This will help achieve the perfect consistency.
- Storage and Shelf Life: Store the ice cream base in an airtight container in the fridge for up to 1 week or in the freezer for up to 3 months. Label and date your container for easy identification.
Looking for more recipes?
Try Carmel Ribbons Ice Cream, Olive Oil Ice Cream, or Olive Oil Sorbet.
Did You Make this Recipe?
Please leave a comment and rating below, also let me know what you thought of this recipe. Be sure to snap a picture and tag me on Instagram @Meghanitup or share it on Pinterest so that I can follow along.
HUNGRY FOR MORE? You can also follow along on Instagram and Pinterest for more recipe updates.
Recipe Card
📋 Recipe

Salt & Straw Ice Cream Base
Want to Save This Recipe?
Enter your email & I'll send it to your inbox. Plus, get great new recipes from me every week!
By submitting this form, you consent to receive emails from Meghan It Up.
Ingredients
- ½ cup granulated sugar
- 2 tablespoons dry milk powder
- ¼ teaspoon xanthan gum
- 2 tablespoons light corn syrup
- 1 –⅓ cups whole milk
- 1 –⅓ cups heavy cream
Instructions
- In a small bowl, combine the granulated sugar, dry milk powder, and xanthan gum. Stir well to ensure they are evenly mixed.
- In a medium pot, pour the light corn syrup and stir in the whole milk. Then, add the sugar mixture from step 1. Immediately whisk vigorously until the mixture is smooth and well combined.
- Set the pot over medium heat and cook the mixture, stirring often. Adjust the heat if necessary to prevent it from simmering. Cook until the sugar has completely dissolved, which should take about 3 minutes.
- Remove the pot from the heat source.
- Add the heavy cream to the mixture and whisk thoroughly until everything is fully combined.
- Transfer the ice cream base mixture to an airtight container.
- Refrigerate the mixture until it is well chilled. For the best texture and flavor, it is recommended to refrigerate for at least 6 hours. For even better results, refrigerate the base for 24 hours. If the base separates during the resting time, stir it back together.
- The ice cream base can be stored in the fridge for up to 1 week or in the freezer for up to 3 months. If you store it in the freezer, make sure to fully thaw the frozen base before using it.
Notes
- Whisk Vigorously: When combining the corn syrup, milk, and sugar mixture, whisk vigorously to ensure a smooth and well-combined ice cream base.
- Chill Thoroughly: Allow the base to chill for at least 6 hours, or ideally 24 hours, in the refrigerator. This resting time enhances flavors and texture.
- Prevent Simmering: When cooking the mixture, adjust the heat to prevent a simmer. Cooking without simmering ensures the right texture and consistency of the base.

Comments
No Comments